Gomo SIM Registration
According to the Sim Registration Act, registering your GOMO SIM card is required. GOMO is similar to other service providers like Globe, Smart, TM, and TNT. Registering your SIM is crucial for protecting your personal information and ensuring that no one else can access your data illegally.
Once you buy a GOMO SIM, you can register it in a few simple ways. You can use the GOMO app, visit a physical store, or choose other available methods. GOMO also provides a smooth internet connection and offers quick call and text plans to make staying connected easy and reliable.
GOMO SIM Registration [Different Ways]
Registering your GOMO SIM is as easy as Globe Sim registration and can be done in a few ways: through a web portal, the GOMO app, or via SMS. Here’s how you can do each one:
Through the Web Portal:
- Go to the GOMO SIM web portal at https://www.gomo.ph/.
- Have a valid ID ready, such as a Passport, SSS ID, GSIS e-Card, Voter’s ID, Postal ID, UMID, or TIN ID.
- Fill out the “Personal Data Form” with your full name, birthdate, address, gender, mobile number, and email address.
- Upload a clear picture of your ID, making sure it’s visible.
- Check that all the information you entered is correct.
- Click the “Submit” button.
- A confirmation message will appear on your screen.
- Congratulations, your SIM is now registered!
Through the GOMO App:
- Download the GOMO app from the Play Store or App Store.
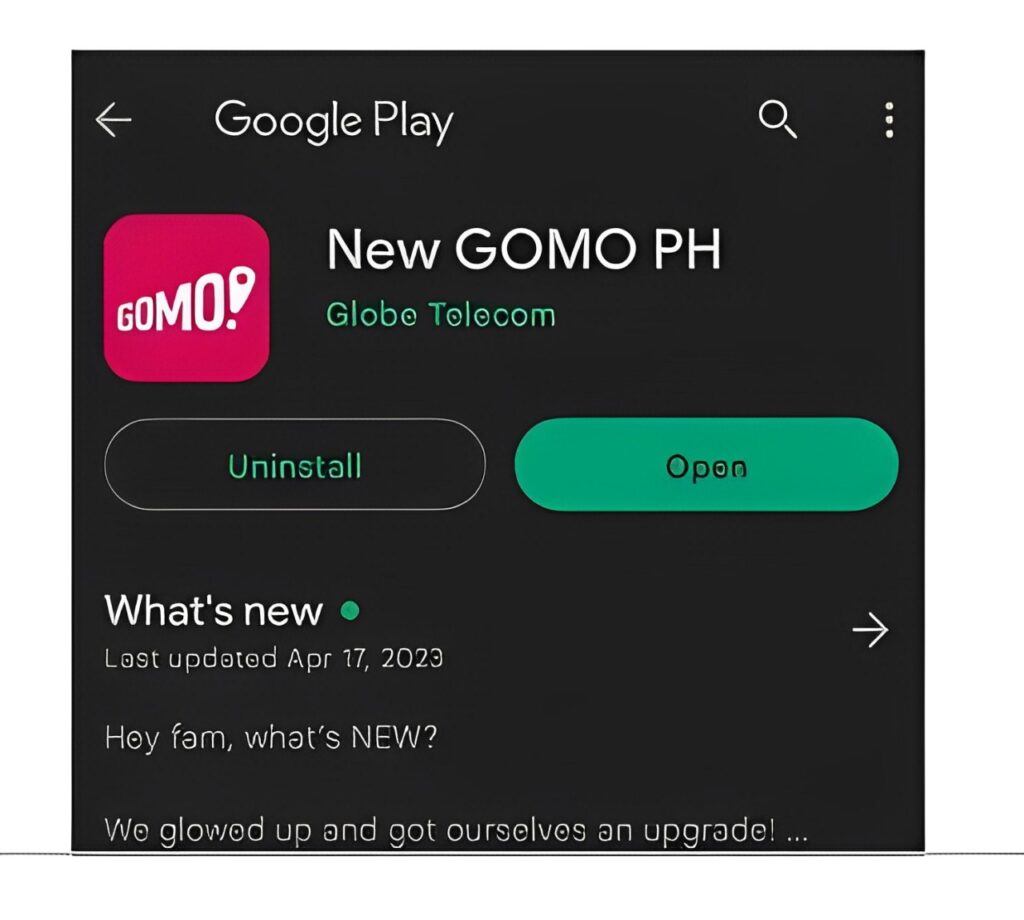
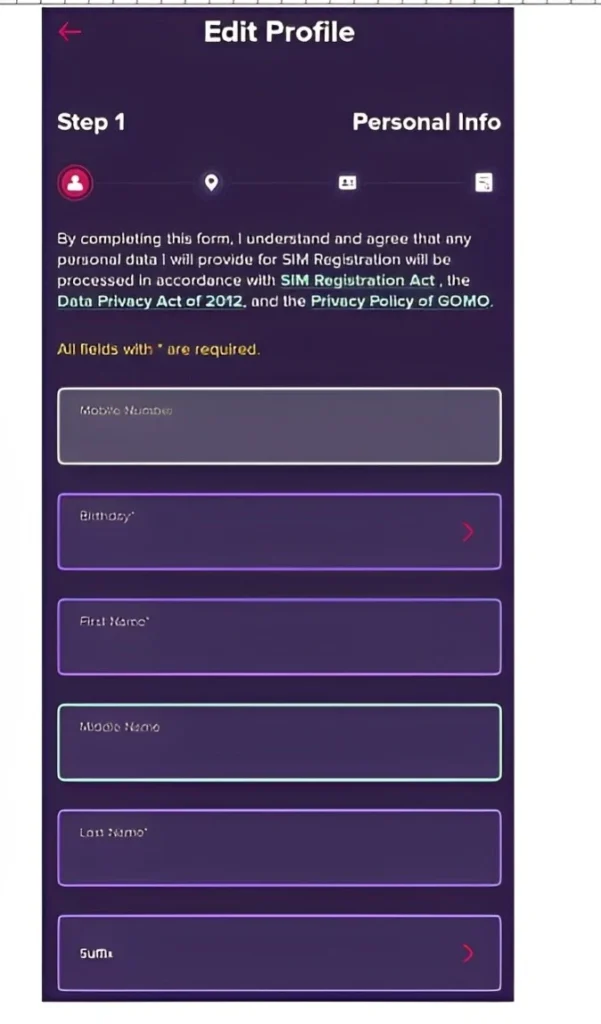
- Open the app and create an account by entering your mobile number, birth date, first and last name, and email address.
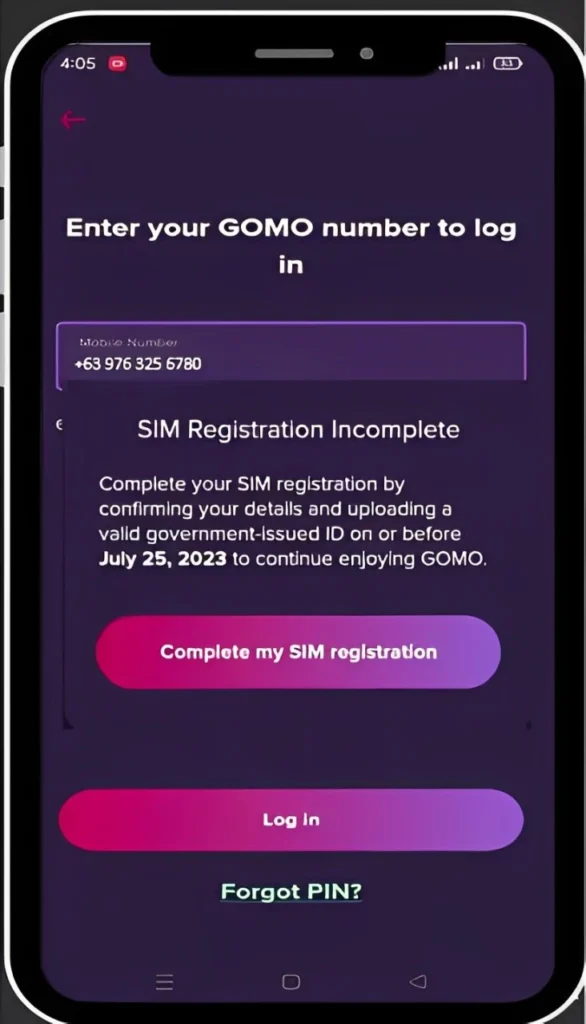
- Click on “Complete SIM Registration” and proceed.
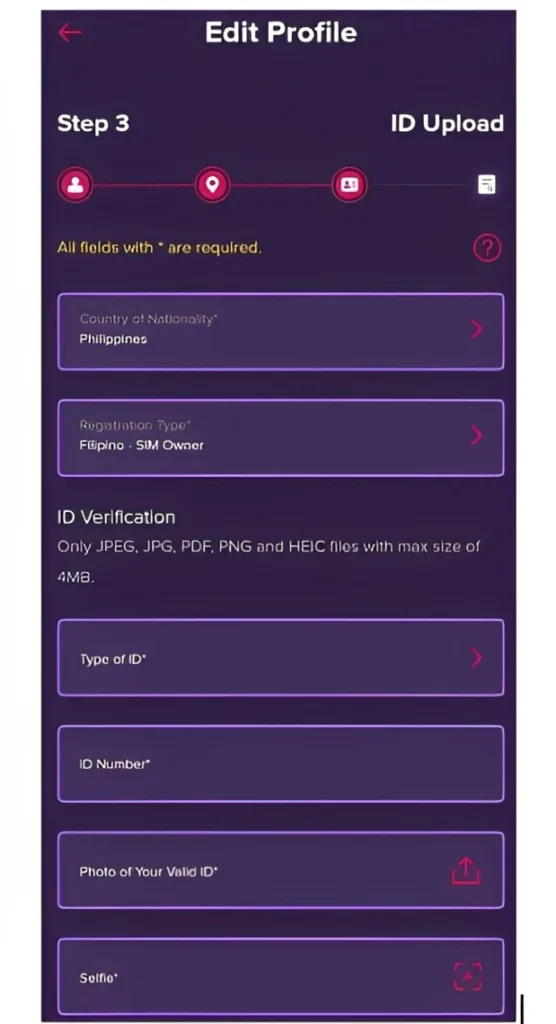
- On the next page, provide your nationality and registration type.
- Upload your ID card, including the type of ID, ID number, a photo of your ID, and a selfie.
- Verify your information and submit the form. GOMO will review your details.
- A verification code will appear on your screen. Enter this code to confirm your registration.
- Congratulations, your GOMO SIM is now successfully registered!
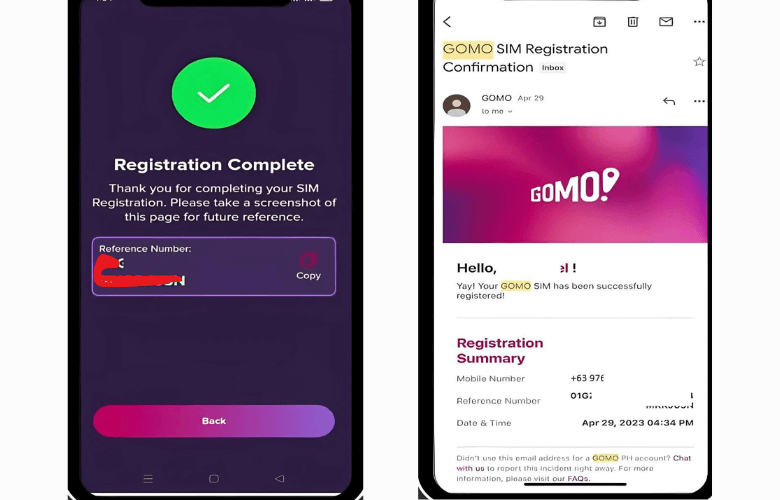
Through SMS (Text):
- Insert your SIM into your phone.
- Open a new text message and enter your GOMO SIM registration details.
- Type the following: “GOMO Reg” followed by your full name, birth date, gender, and address.
This easy process ensures your SIM is registered properly and ready for use.
How to Check Gomo SIM Registration Status
If you want to check whether your GOMO SIM is registered, you can use one of these two simple methods: dialing a code or sending an SMS. Here’s how:
By Dialing a Code:
- Open the dial pad on your phone.
- Type *101# and press the call button.
- Wait for a few moments. You’ll receive a text message confirming whether your SIM is registered.
By Sending an SMS:
- Open your text messaging app.
- Start a new message and type the word “Register.”
- Send this message to 26888.
- Wait for a reply. You’ll get a confirmation text showing the status of your SIM registration.
These easy steps will help you quickly check if your GOMO SIM is properly registered.
Information Needed for GOMO SIM Registration
To register your GOMO SIM card, you’ll need to provide some important information and have a valid ID. Here’s what you need:
Required Information:
- Full Name
- Date of Birth
- Gender
- Address
- Government ID with a photo
- A statement confirming that the ID you’ve provided is accurate
For Corporations:
- SEC Certificate of Registration
- Board Resolution naming the authorized representative
For Other Types of Entities:
- Special Power of Attorney
Accepted Government IDs for SIM Registration:
- Passport
- National ID
- Social Security Service ID
- Government Service Insurance System e-Card
- Driver’s License
- National Bureau of Investigation Clearance
- Police Clearance
- Firearms License to Own and Possess ID
- Professional Regulation Commission ID
- Integrated Bar of the Philippines ID
- Overseas Workers Welfare Administration ID
- Bureau of Internal Revenue ID
- Voter’s ID
- Senior Citizen’s Card
- Unified Multi-purpose Identification Card
- A person with Disabilities Card
- Any other government-issued ID with a photo
Make sure you have all the required details and a valid government-issued ID with a photo when you register your GOMO SIM same as TNT Sim registration. This will help make the process quick and easy.
Common Issues During Gomo SIM Registration
Sometimes, you might run into problems while registering your SIM card. Here are some common issues and how to fix them:
SIM Card Not Detected:
- Make sure your SIM card is inserted correctly into your device.
- Check if your SIM card is compatible with your device.
Unable to Download the GOMO App:
- Check your internet connection to ensure it’s working properly.
- Go to the Play Store or App Store and try downloading the app again.
- If needed, use a VPN to help with downloading.
Registration Procedure Failed:
- Double-check the information you entered, such as your email, name, and phone number.
- Ensure all the details are correct and try registering again.
Didn’t Receive Confirmation Email:
- Check your email’s spam or junk folder.
- Verify that you entered your email address correctly.
- If you still haven’t received it, try resending the confirmation email or contact support for help.
By following these steps, you can resolve common Gomo SIM registration issues and successfully register your GOMO SIM.
How to Register Gomo SIM for Minors?
When registering a GOMO SIM card for someone under the legal age, the SIM must be registered in the name of their parent or legal guardian.
- Why Minors Need SIM Cards: Minors may need SIM cards for communication, safety, and educational reasons.
- Registration Requirement: SIM cards must be registered with the user’s personal details, like name and address.
- Parental Responsibility: Since minors can’t legally handle contracts, their parents or guardians must manage the SIM card registration.
- Legal Compliance: Registering the SIM under the parent’s or guardian’s name meets legal requirements and links the SIM to a responsible adult.
- Monitoring and Safety: This SIM registration Gomo allows parents or guardians to oversee and control the SIM’s use, ensuring it’s used responsibly.
GOMO SIM cards for minors should be registered under the parent’s or guardian’s name to comply with laws and ensure proper oversight.
How to Register Gomo SIM for Foreign Tourists?
Requirements:
- Passport: Provide a copy of your passport, including the bio page and any pages with your current visa.
- Proof of Address in the Philippines: You need to show where you are staying, like a hotel booking or a letter from the place you’re staying. If you’re not staying in a hotel, an affidavit or letter from the owner of the residence is acceptable.
- Return Ticket: Show your return ticket to your home country or another destination, which should include the date and time of your departure from the Philippines.
For Foreign Nationals with Other Types of Visas:
- Passport: Provide a copy of your passport, including the bio page and any visa pages. Ensure it shows your passport number, full name, and nationality.
- Proof of Address in the Philippines: Similar to tourists, show proof of where you are staying. This can be a hotel booking or a letter from your host if you’re staying in a private residence.
- Additional Documents:
- Alien Certificate of Registration Identification Card (ACRI-Card): If you have this card from the Bureau of Immigration or another official ID.
- Alien Employment Permit: If you work in the Philippines, provide this permit from the Department of Labor and Employment. Students should show their school registration and student ID.
- For Persons of Concern (POCs): Provide any travel or admission documents issued by the Philippine Department of Justice.
Make sure to gather all necessary documents and meet these requirements to successfully register your GOMO SIM as a foreign tourist or national in the Philippines.
How to Activate Your GOMO SIM (LTE and 5G)
Activating your GOMO SIM card is easy with these steps:
- Insert the SIM Card: Place the GOMO SIM card into your mobile device. Make sure your phone is turned off before inserting the SIM.
- Turn On Your Device: Power up your mobile device.
- Connect to the Network: Wait for your phone to find the GOMO network. This might take a minute. You’ll see signal bars on your screen when it’s connected.
- Receive Activation SMS: You should get an SMS from GOMO once connected. This message will have details about your plan and activation.
- Follow SMS Instructions: Open the activation SMS and follow the steps provided. This might include replying to the message or clicking on a link to confirm activation.
- Restart Your Device: Sometimes, you need to restart your phone to finish the activation. Turn your device off and then back on.
- Check Your Services: After activation, check that your data, calls, and messages are working. Make a call, send a message, and use the internet to ensure everything is set up correctly.
- Monitor Your Balance: Keep track of your balance and data usage, especially if you have a prepaid plan. You can check your balance by dialing a specific code or using the GOMO app.
If you run into any problems, contact GOMO customer support for help. They can assist you with any issues during activation.
Be sure to follow any extra instructions GOMO provides, as they might differ depending on your location or plan.
Conclusion
In conclusion, registering your GOMO SIM is a straightforward process that ensures your SIM card is active and ready to use. By following the required steps and providing the necessary documents, you can quickly get connected. If you face any issues, GOMO’s customer support is available to help. Proper registration also keeps your mobile services secure and compliant with regulations.

![Gomo SIM Registration Online Link [Quick Guide & Steps]](https://globesimregistration.com.ph/wp-content/uploads/2024/08/TNT-Sim-Registration-Online-with-Link-2024-5-1-1.webp)
